Important Background information crucial to creating photosets properly.
TITLE your photos, Get your VIEWPOINTS, Meet all RECOMMENDATIONS.
How to Title Your Photos
Include these four critical pieces of information in both the photo title and file name:
- WHEN: Specify the date you took the photo (e.g., "10.2.20" or "2Oct20").
- WHAT and WHERE: Identify what you want assessed and the specific body location (e.g., "Lesion A on the right cheek," or "rash on the upper back"). All spots for assessment must be clearly marked on the photo or body using letters or numbers.
- WHY: Indicate the viewpoint or purpose of the photo (e.g., close-up for detail, sizing with a ruler, or general context).
Additional Tips:
- Use the title as both the label displayed on the photo and the filename of the image.
- Ensure the label is readable, ideally large enough to view clearly in thumbnails and details mode.
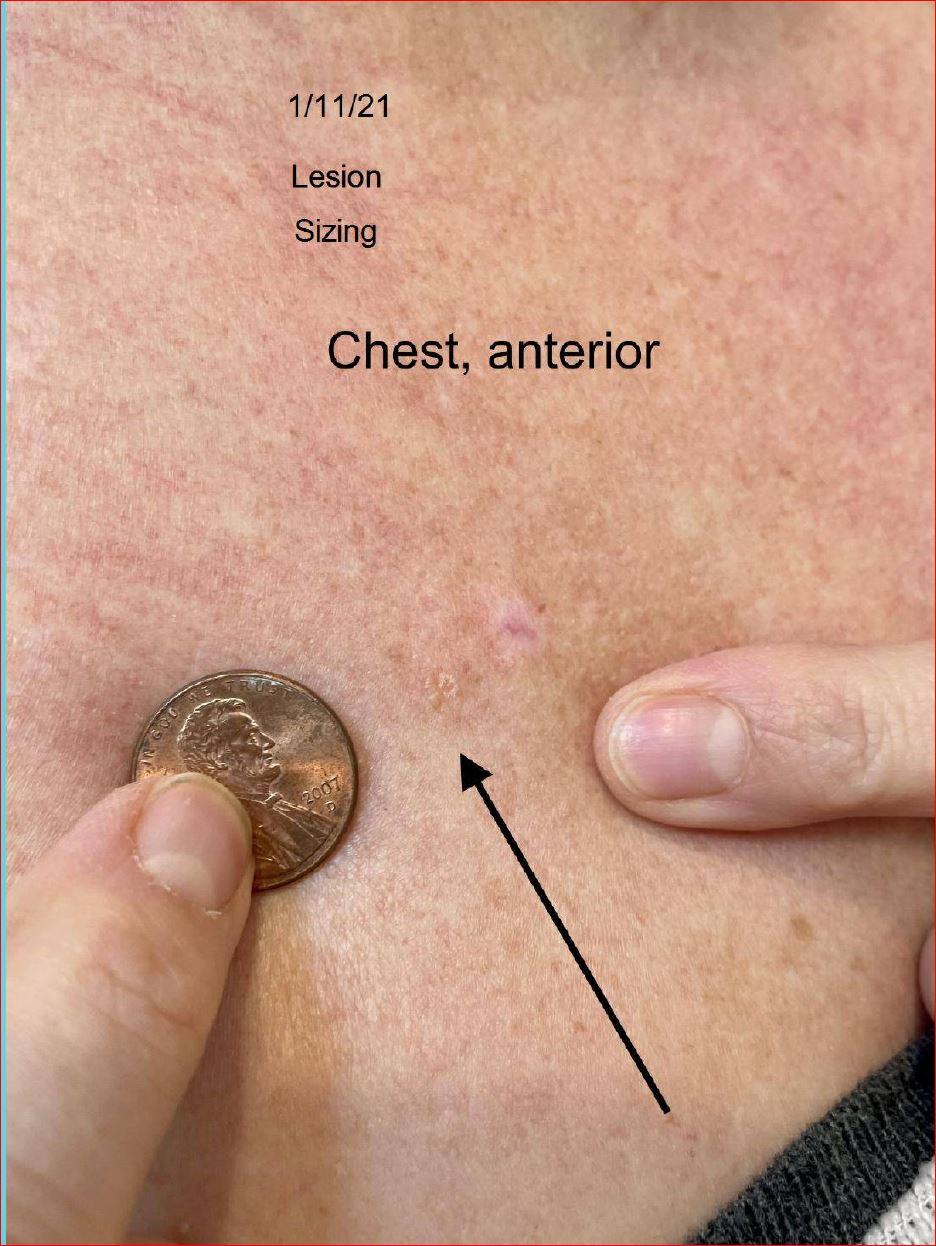
Fig 1: Submitted Photo Example
Key Observations:
- The title is present on both the photo and its filename, ensuring clarity and easy identification.
- Includes all critical details in order: WHEN, WHAT, WHERE, and WHY.
- Font Size: Slightly small but acceptable for the label on the photo itself.
- Photo Quality: Sharp focus with clear depiction of the target lesion, highlighted by an arrow.
- Lighting: Proper lighting preserves color accuracy without bleaching or distorting the image.
- Sizing Mechanism: Penny is used as a reference for size. While effective, a ruler is preferred for direct measurements without requiring ratio calculations.
- Evaluation: This photo meets quality standards, ranging from good to excellent, for dermatological assessments.
VIEWPOINTS: CLOSE-UP, DISTANCE, SIZING
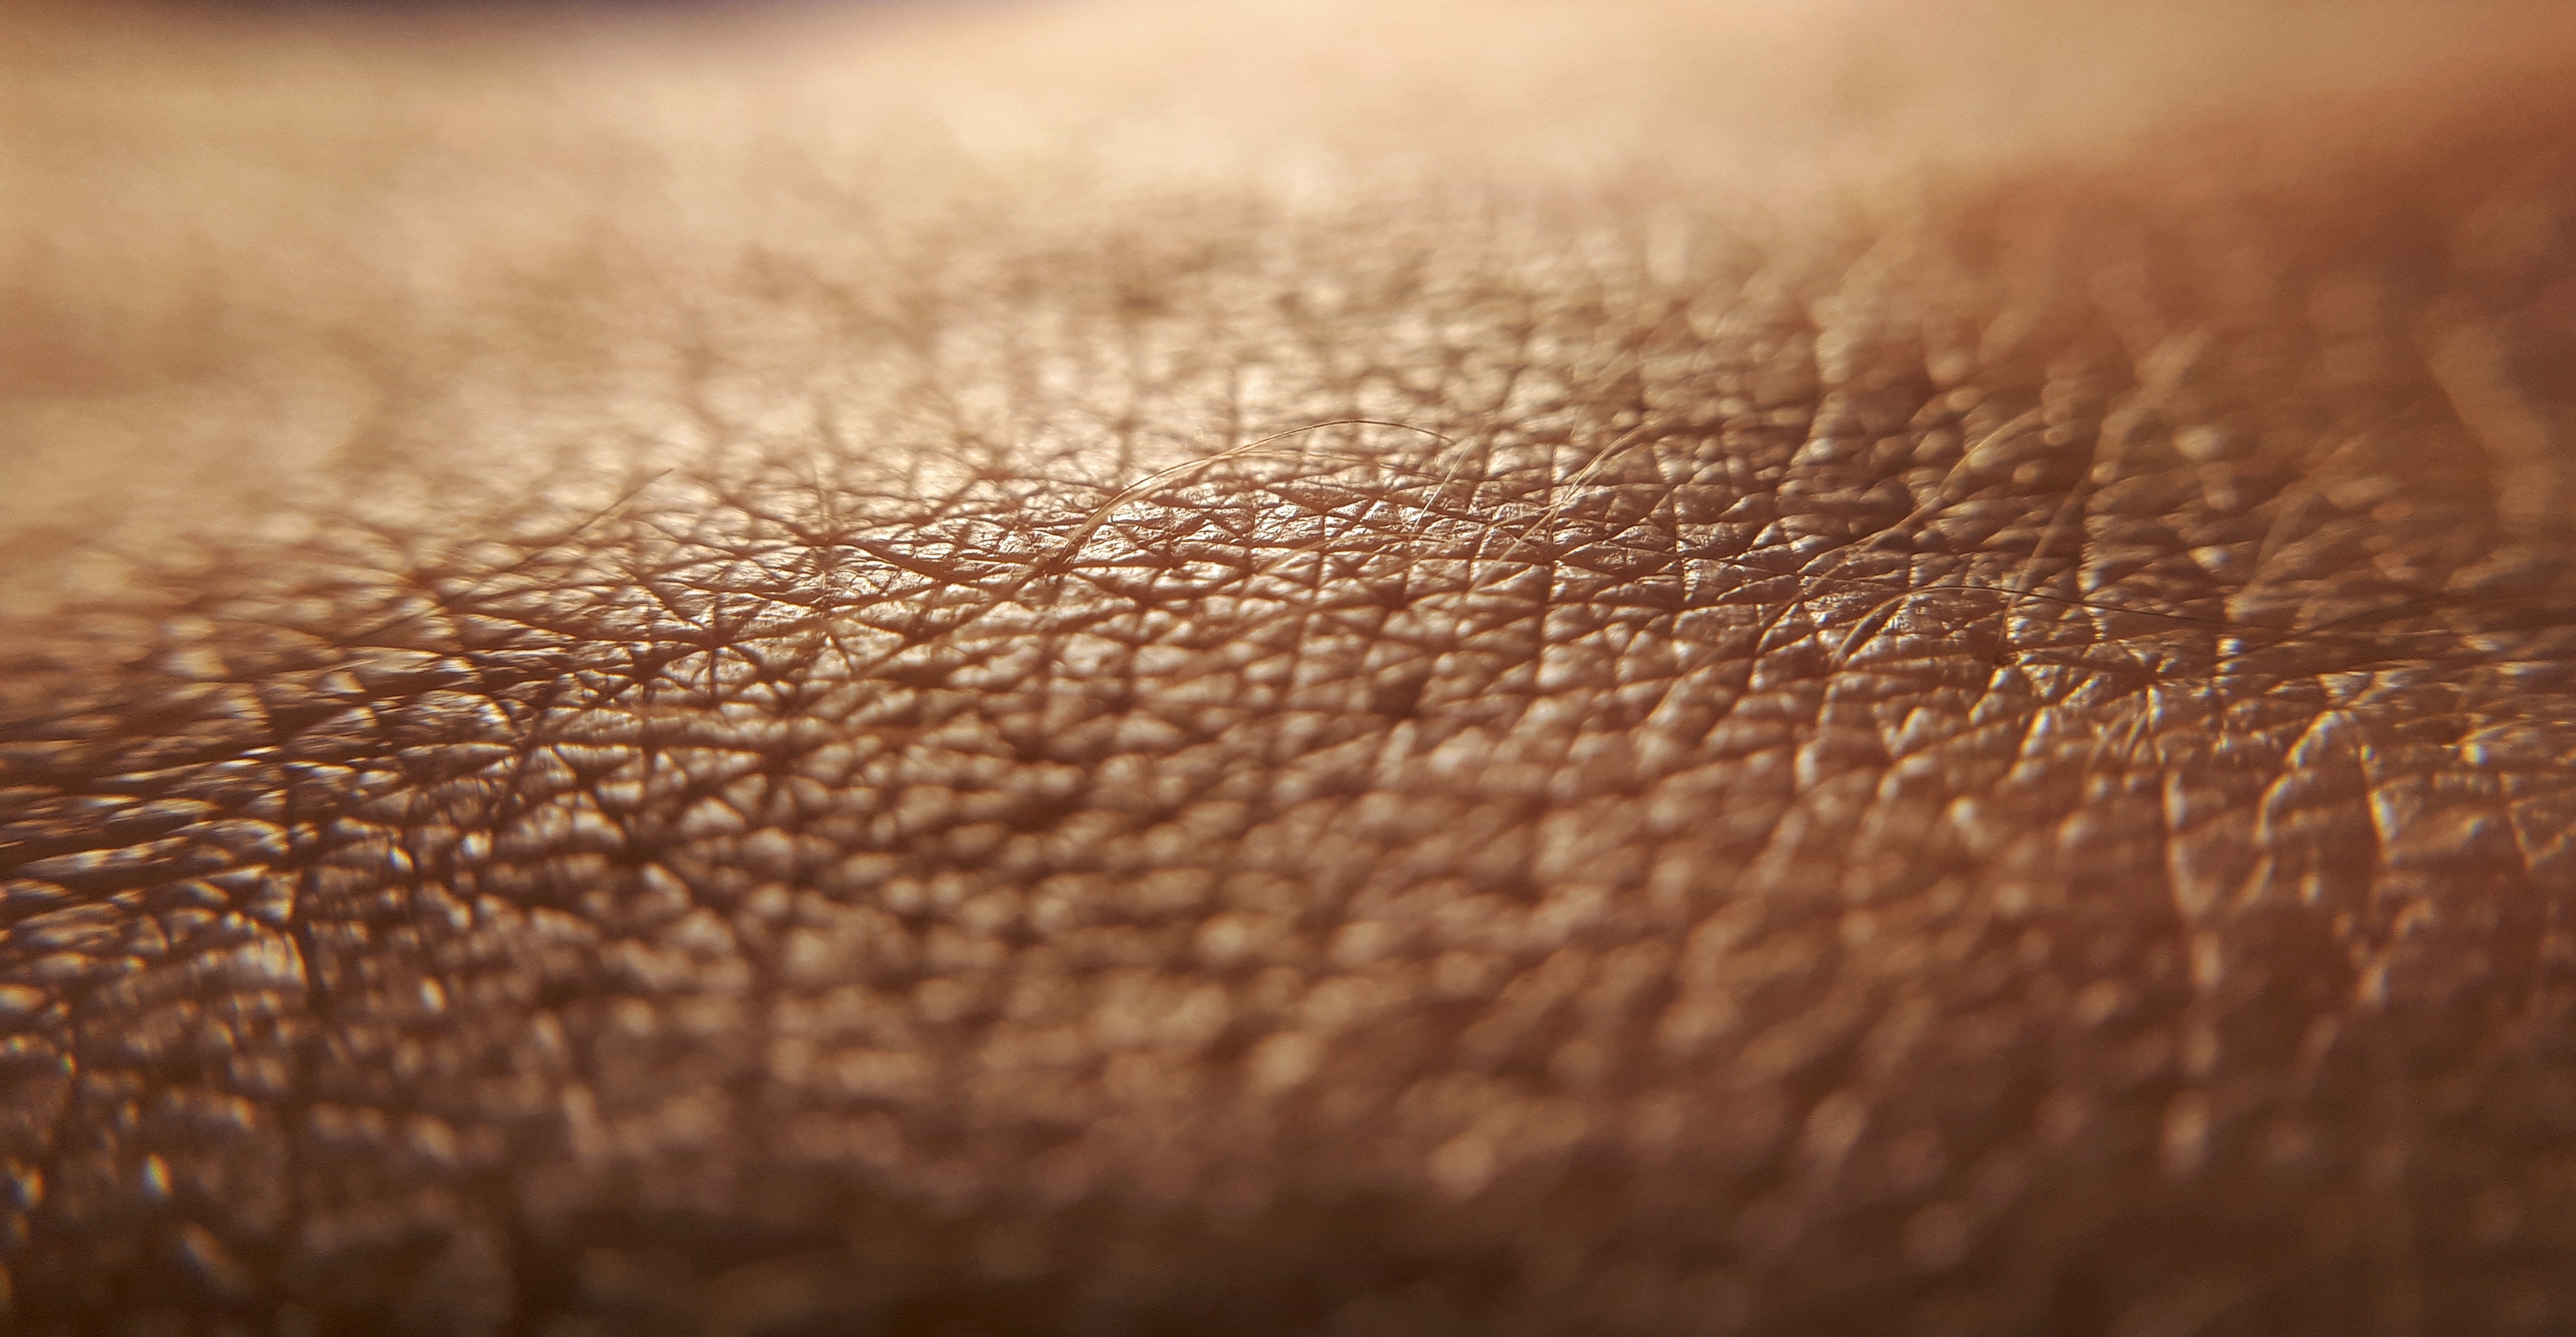
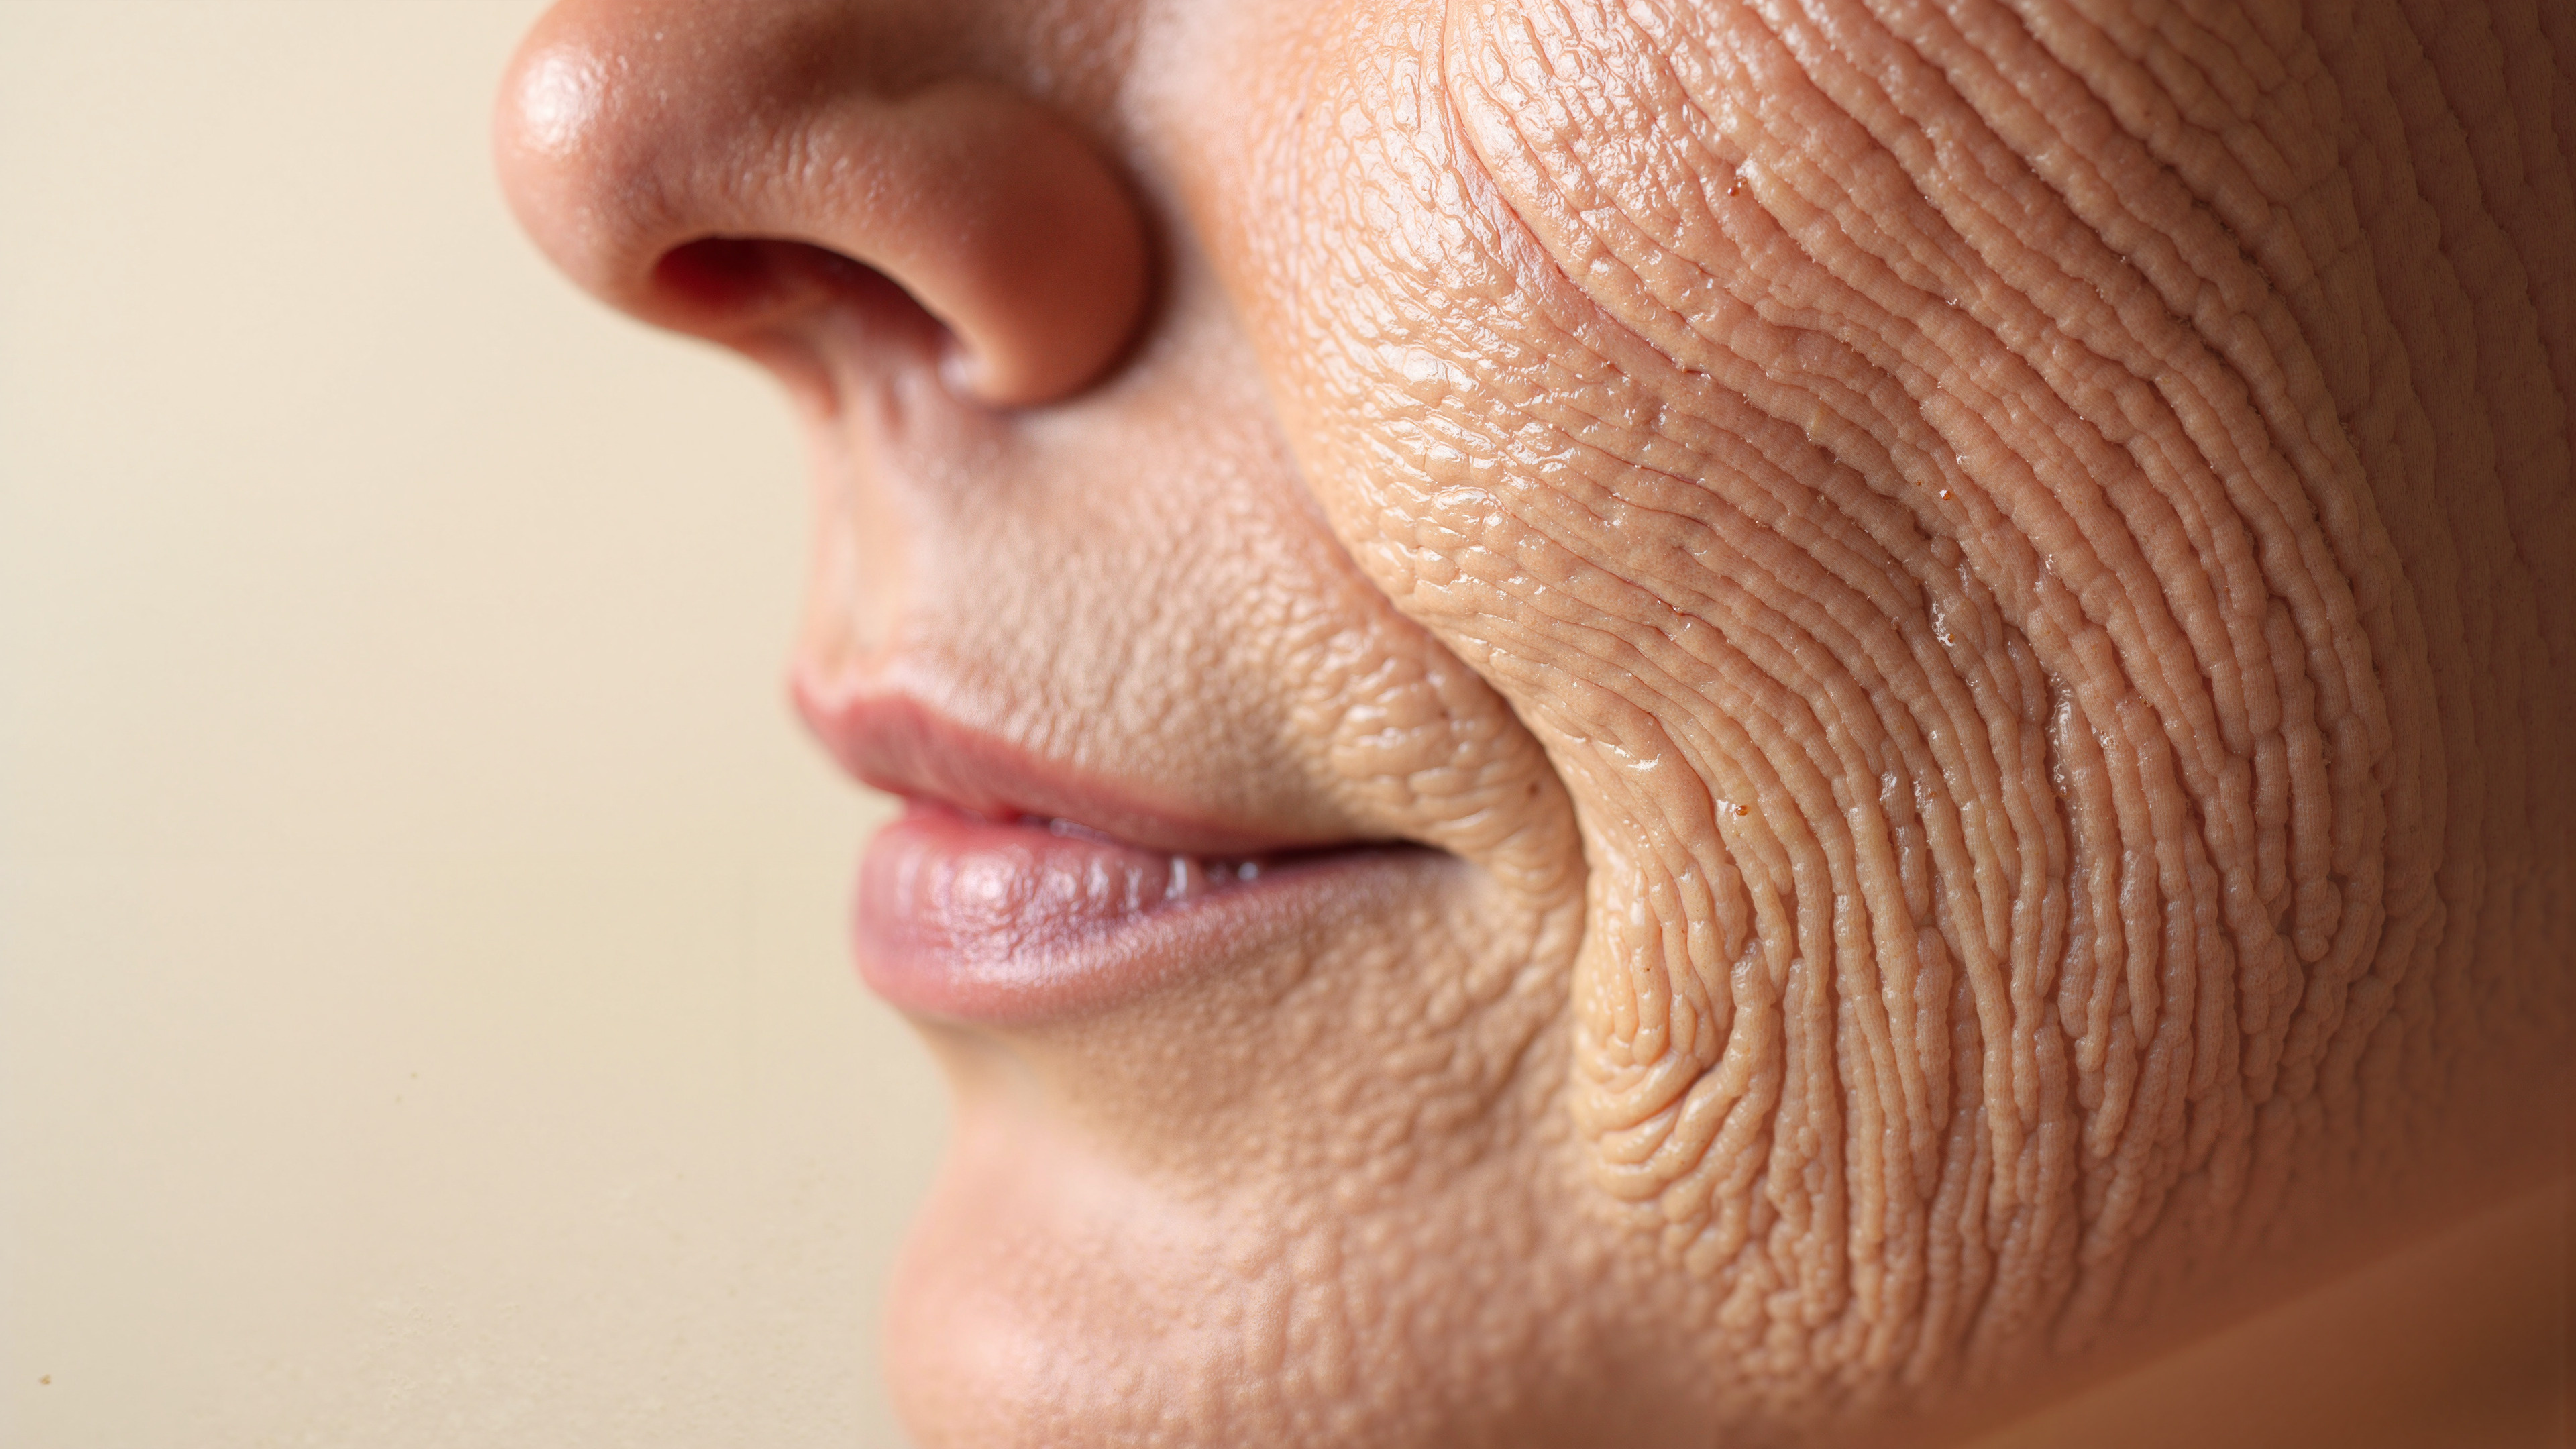
- CLOSE-UP Views
- Goal: Capture fine details such as skin crinkles, individual hairs, and hair follicles clearly.
- Focus: Sharp focus is essential. For rashes, focus on the edges, the newest areas, and a representative segment of the rash.
- Angles: For skin spots, taking close-ups from multiple angles can provide helpful visual information.
- DISTANCE Views
- Goal: Provide context for skin spots or rashes, showing their distribution across the body.
- Coverage: Ensure the entire rash is visible in these shots. Include a typical segment for broader understanding.
- SIZING
- Requirement: All skin spots must be shown in at least one photo next to a sizing reference.
- Preferred Reference: A ruler for direct measurement.
- Alternative: A common object such as a penny, which can be included in close-up or distance views.
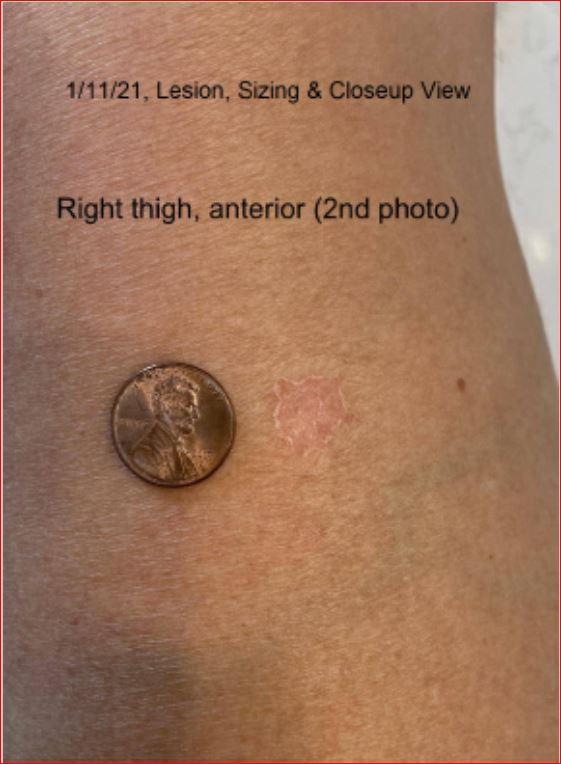
Fig 2: Submitted Photo Example
Key Highlights:
- Labeling: The title is present both on the photo itself and as the filename, ensuring essential information is displayed regardless of how the file is stored or viewed.
- Lighting: Good overall, though a slight shadow is present, which could cause minimal distortion.
- Background: Neutral and uniform white, avoiding any distractions from the focal point.
- Sizing Mechanism: A penny is used for scale, placed directly next to the target lesion. (Note: A ruler, as preferred in Fig. 1, is recommended for easier measurement.)
- Close-Up Detail: Allows zooming in to see skin crinkles, the collarette of scale around the pink lesion, and individual hair follicles with clarity. These details are crucial for accurate visual diagnoses and exemplify the value of high-quality close-ups.
Improvement Tips:
- If the close-up lacks sufficient detail, retake the photo.
- For persistent issues, enlist assistance from a photohelper to ensure optimal focus and framing.
Recommendations for Submitting Photos
- Allow Time for Processing
- Expect 24-48 business hours for photo processing.
- Appointments arranged for same or next day will also include photo processing.
- Focus is Key
- Close-Up Viewpoint: Ensure the photo is sharply in focus—when zoomed in, you should clearly see:
- Skin crinkles
- Individual hair follicles and hair strands
- The fine network of vessels indicating inflammation
- Close-Up Viewpoint: Ensure the photo is sharply in focus—when zoomed in, you should clearly see:
- Lighting Matters
- Use indirect light or take photos outside on a sunny day for the best results.
- Avoid flash or lighting that alters the original coloring.
- If comparing with previous photos, maintain uniform and adequate lighting conditions.
- Orientation and File Size
- Ensure the photo is oriented right side up and check that the file size isn’t excessively large.
- Double-check orientation and file details before submission.
Key Features